Before Your Begin
Please ensure you have successfully installed the WAIR Shopify App and have approved the app's charges in Shopify. If you have yet to received your install link, please reach out to the WAIR Support Team at help@getwair.com.
Important: We highly recommend that the person conducting the installation of this CTA has prior experience editing your Shopify theme code and understands HTML, liquid, and CSS.
Recommended placements for the WAIR Universal CTA
- Size Guide landing pages
- Header and footer menus
- FAQ pages
Anywhere on your site where you feel shoppers may be looking for size and fit assistance is a great place for WAIR to be installed. By making sure shoppers have easy access to the WAIR body survey in these locations will ensure a reduction in the number of size-related support inquires you team will receive.
Brand Examples:
- Holderness & Borne (fit guide landing page)
- Fresh Clean Threads (footer menu)

Step 1: Ensure WAIR Scripts are enabled via Shopify's App Embed feature
- Log into your Shopify Admin Account.
- Navigate to Sales Channels > Online Store.
- For the theme on which you would like to install WAIR Universal CTA, click the 'Customize' button. You will be taken to the Shopify Theme Customizer for that theme.

- In the top left corner, click the App Embeds icon.
- Ensure the 'WAIR Scripts' toggle is enabled.
- Click 'Save' in the top right corner.
Step 2: Gather the WAIR Universal CTA HTML snippet from your WAIR Dashboard
- Log into your WAIR Dashboard (if you do not have access, please reach out to the WAIR Support Team at help@getwair.com).
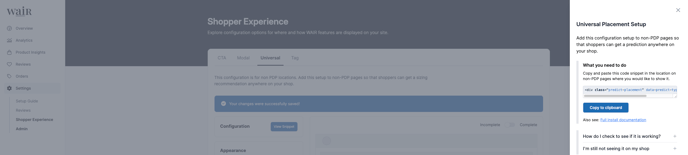
- Navigate to Settings > Shopper Experience.
- Navigate to the Universal tab, click 'View Snippet'.
- Important: Do not use the snippet listed under the CTA tab as this is different.
- Copy the WAIR Universal CTA HTML snippet.
- Please note that styling customizations for the CTA are also available on this dashboard page.
- You'll have the option between banner format, button format, and link format, along with other customizations like color and logo preferences.
Step 3: Install the HTML snippet onto your site
- Log into your Shopify Admin Account.

- Navigate to Sales Channels > Online Store.
- For the theme on which you would like to install WAIR, click the three-dot menu button (next to 'Customize') and click 'Edit Code'.
- Locate the proper .liquid file responsible for the location you would like to install the CTA. Please note, this file often changes based on which Shopify theme is in use.
- Paste your WAIR Universal CTA HTML snippet in your desired location within your theme code.
- You can further customize the WAIR CTA by using the CTA styling customizations available on your WAIR Dashboard, or by adding CSS to style the HTML snippet. For guidance on what CSS to use, please reference this knowledge base article for more details.
- Click 'Save' in the top right.
For instructions on how to Preview your installation of the WAIR PDP CTA, click here!